Blog

CONTINOUS BOUND PLACKET – OXANNE – Tutorial

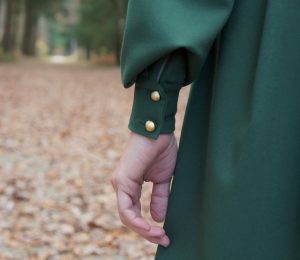
Making of a continous bound placket

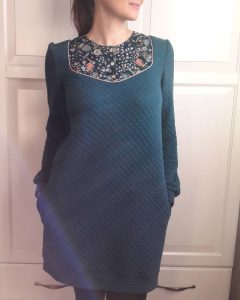
This technique is used for the sleeves of Oxanne dress.

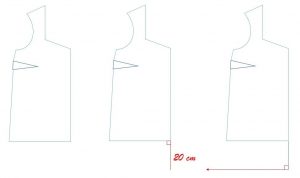
At the end of this article, I tell you how to modify the bottom edge of the sleeve in order to enlarge it.

The principle of this technique is to enclose the sharp edges of the cut (at the bottom of the sleeve) in a bias tape. I give you a method but there are surely others, use the one that suits you best.

Read more…

NECKLINE FINISHING

How to finish a neckline using a bias tape

Neckline finishing. Here is a tutorial that I hope will be useful, especially to finish the neckline of the Ortense blouse or Nell top. I describe the two techniques I use, but there may be others!

Method 1

I use this one when I cut my bias in a piece of fabric.

Width of the folded bias = 2 cm (13/16 in)

Read more…

WHEN ORTENSE TURNS TO A DRESS

Blouse Ortense - Anna Rose Patterns

Ortense dress

Everything you need to know to sew Ortense dress!

Take:

  • Ortense blouse Pattern and some paper to modify it
  • The supplies indicated on the pattern – Caution: you need 1,80 m (about 2 yards) of fabric for the dress
  • A ruler or a meter
  • A set square
  • A pencil
  • Pattern of the pockets (see drawing or OLGGA skirt pockets’ pattern, for those who have this pattern). Here I give you some indications but it is not necessary that the curve is absolutely identical.

Seam allowances are included.

Alterations:
  • Front and Back extended by 20 cm (7 7/8 in) (from the straight version)
  • Shortened sleeves : 2 cm (13/16 in) from the bottom
  • Length of the sleeves and dress bands: 12 cm (4 3/4 in, seam allowances included)
    Width of sleeves bands: 21 cm (8 1/4 in, seam allowances included)

Steps:

Pattern alteration:
  • Extend the Front by 20 cm (7 7/8 in) as describe.
  • Draw a perpendicular to this new line.

  • Extend the side, following the initial angle.
    You can slightly round the bottom of the new piece as describe, but it is not a requirement.

  • Repeat this step with the Back
  • Shorten sleeves by 2 cm (13/16 in).
  • Draw a pocket pattern as indicated
Cut all the pieces in your fabric.

Caution: you need 4 pocket pieces.

Making up:
  • Follow instructions of the Ortense blouse pattern. There are no buttons on the dress I have sewn, so I cut the front and back yokes in one piece each.
  • Overcast the pockets curves.
  • Before overcasting and closing the dress sides, sew pockets pieces on the Front and the Back, right sides together (see drawing). The top of the pocket is about 30 cm (11 13/16 in) away from the bottom of the dress (without the band). Make sure to position your pockets pieces so that the front pockets will perfectly face the back pockets.

  • Overcast dress sides + pockets.
  • Place Front and Back right sides together (pockets out). Sew in two steps: From the sleeves edges to the pockets, and then from the pockets to the bottom of the dress.
  • Dress seams must overlay pocket seam ends on 1 cm (3/8 in) (see drawing).
  • Sew the pocket pieces right sides together.

  • Sew the dress and sleeves bands as indicated in pattern instructions.
  • Follow the last pattern instructions to finish your dress.

There you go, your dress is ready! I hope you enjoyed this tutorial!